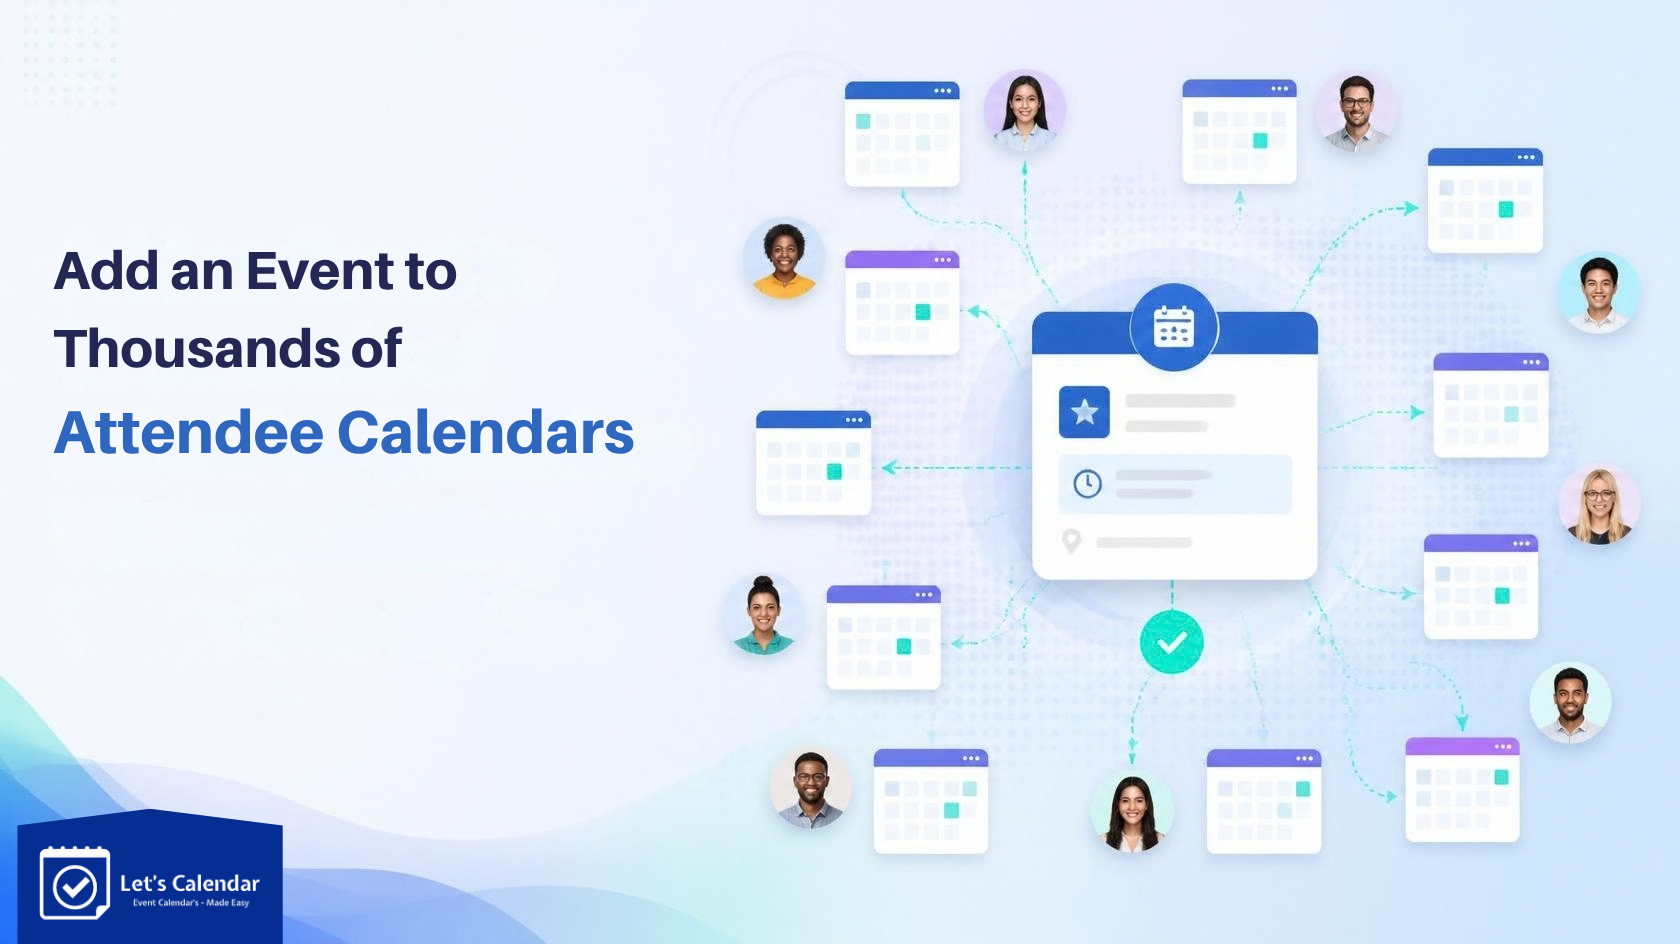
Add an event to thousands of attendee calendars using Let’s Calendar bulk invitations.

Add an Event to Thousands of Attendee Calendars 

Getting 10 people add an event onto an event calendar is easy. Getting 1,000, 10,000, or more registered attendees onto the right event without manually adding every email address is a different challenge. For webinars, conferences, training programs, customer events, and large meetings, organizers need a simple way to manage attendee calendars at scale. That is where Let’s Calendar comes in. Instead of adding attendees one by one, you can create your event once, import or automatically sync your registered attendees, and send personalized calendar invitations in bulk. Whether you’re trying to understand how to add event to calendar for a large audience or need to send Mass calendar invites, here is how the complete process works.

Why Adding Attendees Manually Doesn’t Work at Scale

A normal calendar works well when you’re organizing a small meeting. You create the event, enter a few email addresses, and send the invitation. But imagine doing the same thing for 5,000 webinar registrations. You have to manage:
  • Thousands of email addresses
  • New registrations coming in every day
  • Personalized attendee information
  • Event dates and time zones
  • Meeting or webinar links
  • RSVP responses
  • Last-minute event changes
This is why a Bulk calendar invite workflow is useful. Let’s Calendar is designed to let organizers create one campaign and manage a large attendee list without manually adding every participant. Attendee lists can be imported in bulk, and Let’s Calendar also supports automated workflows through integrations such as Zapier. 

Add to Calendar vs. Sending a Calendar Invite

Before setting up your event, it helps to understand the difference between these two methods.

Add to Calendar

An Add to Calendar button or link lets the attendee choose to save an event to their preferred calendar. For example, you could place a calendar add event button on:
  • Your event website
  • Registration confirmation page
  • Confirmation email
  • Landing page
The attendee clicks the button and chooses their calendar. Let’s Calendar supports Add to Calendar links/buttons for major calendar platforms. 

Direct Calendar Invitation

A direct calendar invitation works differently. Instead of waiting for attendees to click an Add to Calendar button, the organizer sends a calendar invitation to the registered attendee. This is particularly useful when you already have a list of confirmed registrations and want to manage Bulk calendar invites from one place. Let’s look at how this works.

How to Send Bulk Calendar Invites with Let’s Calendar

The basic workflow is straightforward: Configure Sender Email →  Create Campaign → Add Attendees → Send

Step 1: Create Your Event Campaign

Start by creating a campaign in Let’s Calendar. This campaign becomes the central place for the event you’re sending to attendees. Add the important event information, such as:
  • Event title
  • Description
  • Start date and time
  • End date and time
  • Time zone
  • Physical location or virtual meeting link
  • Other information attendees need
For example, if you’re hosting a webinar on November 20 at 2 PM, you create that event once rather than creating a separate event for every participant. Let’s Calendar standard setup follows the same simple process: set up the event, import contacts, preview the invitation, and send it. 

Step 2: Add Your Attendees

Once your campaign is ready, you need to bring your registered attendees into it. For an existing attendee list, you can import contacts in bulk rather than entering them one at a time. For example, if you already have 5,000 registrations in an Excel or CSV file, you can import that list into the campaign. This is one of the simplest ways to Send Bulk calendar invites for an event where the attendee list is already available. But what happens when your registration list isn’t final? That’s where automation becomes much more useful.

Automatically Send Calendar Invites When Someone Registers

Many events don’t receive all their registrations at once. Imagine that your webinar registration page opens three weeks before the event:
  • 50 people registered today.
  • Another 100 register tomorrow.
  • Registrations continue throughout the week.
  • Some people may even register shortly before the event.
You shouldn’t have to repeatedly download the latest list, upload it to Let’s Calendar, and manually send another batch of invitations. Instead, Let’s Calendar can automate this process using Zapier. The workflow looks like this: Registration Page → Zapier → Let’s Calendar Campaign → Personalized Calendar Invite Let’s go through it in simple terms.

Step 1: Create One Campaign in Let’s Calendar

First, create the event campaign in Let’s Calendar. For example: Campaign: Annual Customer Webinar Date: November 20 Time: 2:00 PM Location: Webinar joining link You only need this one campaign for attendees registering for that event. The campaign contains the event information that will be used when sending invitations.

Step 2: Connect Your Registration Source to Zapier

Next, connect the source where registrations are being collected to Zapier. Depending on your workflow, the trigger could come from a registration form, CRM, Google Sheet, Typeform, or another supported application. The trigger is simple: “A new person has registered.” Zapier detects the new registration and passes the attendee information to Let’s Calendar. 

Step 3: Send the Registration Data to the Correct Campaign

In Zapier, connect Let’s Calendar and select the action “Add Registration to Campaign.” Then map the required attendee information, such as:
  • First name
  • Last name
  • Email address
  • Other information you want to use for personalization
The important part is that the registration is being added to the existing event campaign you created earlier. You don’t need to create a new campaign for every registration. If 2,000 people register for the same webinar, those registrants can flow into the same relevant campaign. 

Step 4: Let’s Calendar Sends the Invitations Automatically

Once the automation is enabled, you don’t need to manually click Send every time someone registers. New attendee data flows from the registration source through Zapier into Let’s Calendar. Let’s Calendar then processes the new registrations and sends calendar invitations automatically on its hourly automation cycle. So your workflow becomes: Person registers → Registration data captured → Zapier sends data to Let’s Calendar → Attendee is added to the campaign → Let’s Calendar sends the personalized calendar invitation This process continues as new registrations arrive. Let’s Calendar For event teams with continuously changing registration lists, this removes a significant amount of repetitive work.
Add to Calendar: Get More People to Show Up
Don’t let attendees miss your event!
Click Here

Personalize Every Invitation – even When Sending Thousands

Sending a Mass calendar invite doesn’t mean every attendee has to receive an impersonal message. Let’s Calendar supports personalized invitation data. Depending on the information available in your attendee source, you can use dynamic information such as:
  • Attendee name
  • Unique reference information
  • Custom fields
  • Personalized joining information
For example, instead of treating 5,000 attendees as one visible group, the invitation can be personalized for the individual recipient. The Zapier integration can map attendee information from the original registration source into Let’s Calendar, allowing the invitation to use that data. This is especially useful for webinars, training programs, conferences, customer sessions, and events where attendees may have different joining information.

What Is an RSVP and How Does It Work?

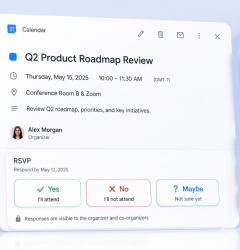
RSVP is the attendee’s response to an invitation. If you’ve ever wondered what is an RSVP, in a calendar invitation it simply helps indicate whether the recipient plans to attend. Depending on the calendar system, an attendee may respond with options such as:
  • Accepted
  • Declined
  • Maybe/Tentative
This gives organizers more visibility than simply sending a standard promotional email. There is, however, an important distinction when using Let’s Calendar. When invitations are sent through a directly connected Google Workspace or Microsoft 365 account, those services can share RSVP data back with Let’s Calendar, allowing supported responses to be displayed in the dashboard. If you’re using a Custom SMTP/email provider for high-volume sending, RSVP responses are handled through the configured Reply-To mailbox rather than being shown as Google/Microsoft RSVP data inside the Let’s Calendar dashboard. This distinction is useful when choosing your sending setup based on your event volume and reporting requirements.

What Happens When Someone Registers Later?

You don’t have to recreate your event. If you’re importing contacts manually, additional attendees can be added to the existing campaign. If you’re using the Zapier automation workflow, new registrations can continue flowing into the campaign automatically. This is one of the biggest advantages of automation. Instead of: Download registrations → Update spreadsheet → Upload again → Send invites → Repeat tomorrow you can have: Registration → Zapier → Let’s Calendar → Invitation This is particularly useful for webinars and live events where registration remains open close to the event date. Let’s Calendar also has a direct Zoom integration for Zoom-based workflows, where registrant data can be fetched and invitations processed automatically on an hourly cycle.

What If Your Event Details Change?

Sending thousands of invitations creates another question: What happens if the event time, location, or joining details change? You don’t want to create a completely new event and start again. Let’s Calendar lets organizers manage the campaign and send event updates when details change. It also supports cancellation workflows when an event is cancelled. For example: Your webinar was originally scheduled for 2:00 PM, but it moved to 3:00 PM. Instead of contacting thousands of attendees individually, update the relevant campaign and send the event update. This keeps the calendar invitation useful beyond the initial send.

When Should You Use an Add to Calendar Button?

Not every event requires a direct invitation. Sometimes you may want visitors to decide whether they want to save the event. For example, an Add to Calendar button can work well on:
  • Public event websites
  • Landing pages
  • Confirmation pages
  • Email newsletters
  • Public event announcements
In this situation, someone searching how to add event to calendar can click the button and choose their preferred calendar. Let’s Calendar supports Add to Calendar links/buttons alongside its direct invitation workflows. Let’s Calendar The choice depends on your audience. Known registered attendees? A direct calendar invitation may be more appropriate. Public website visitors? An Add to Calendar button gives them the choice to save the event. You can also use both approaches where appropriate.

Manual Upload or Automation: Which Should You Choose?

Both methods have a place.

Use a bulk contact upload when:

  • Your attendee list is already finalized.
  • You have the registrations in CSV/XLSX.
  • You want to send one large campaign.
  • New registrations are uncommon.

Use automation when:

  • Registrations arrive continuously.
  • You use an online registration form or CRM.
  • You don’t want to keep importing new files.
  • Attendees should receive invitations as part of an ongoing registration workflow.
So, How to Send Bulk calendar invites depends partly on how your attendee data is collected. For a finalized list, bulk import is simple. For an active registration flow, automation can save much more time.

One Event, Thousands of Individual Invitations

The main idea behind Let’s Calendar is simple: You shouldn’t have to create or send the same event thousands of times. Whether you need a Bulk calendar invite, Mass calendar invites, or an automated registration-to-calendar workflow, you can manage the event from one campaign and bring attendees into that campaign at scale. For teams researching How to send mass calendar invites, the complete workflow can be as simple as: Create your event → Add or sync attendees → Personalize → Send automatically or manually → Manage responses → Send updates when needed This can be used for:
  • Webinars
  • Conferences
  • Training programs
  • Corporate meetings
  • Customer events
  • Online sessions
  • Large internal events
Instead of spending time manually managing calendar events attendee by attendee, your team can focus on running the event itself.

Make Your Registration-to-Calendar Flow Automatic

If you already have your attendee list, add an event or upload it and send your invitations in bulk. If registrations are still coming in, connect your registration source through Zapier and let new attendee data flow into the appropriate Let’s Calendar campaign automatically. Either way, you don’t need to add thousands of people one by one. Let’s Calendar brings the event, attendee data, personalization, sending, automation, and supported RSVP management into one workflow. Ready to simplify your next event?

Create your free Let’s Calendar account and start building your calendar invite workflow.

Frequently Asked Questions

1. How can I send calendar invites to thousands of attendees at once?

With Let’s Calendar, you can create a campaign, upload your attendee list using CSV/XLSX, and send personalized calendar invitations in bulk without adding each attendee manually.

2. Can Let’s Calendar automatically send invites when someone registers?

Yes. By connecting your registration source through Zapier, new registrants can be added to an existing campaign, and Let’s Calendar automatically sends their invitations on its hourly automation cycle.

3. Can I send personalized calendar invitations to each attendee?

Yes. Let’s Calendar supports personalized invitations using attendee information, such as names and other mapped details, so each recipient receives an individual invitation.

4.Can I track RSVP responses in Let’s Calendar?

Yes. RSVP responses can be displayed in the dashboard when using supported Google Workspace or Microsoft 365 connections. For Custom SMTP providers, responses are handled through the configured Reply-To email rather than displayed as direct RSVP data in the dashboard.

5. Can I update or cancel invitations after sending them?

Yes. Let’s Calendar allows you to manage event updates and cancellations through the campaign, so you can notify attendees when event details change or an event is cancelled.

Related Post

Copyright © 2026. All Rights Reserved.

Designed with    by
Manomay Informatics

About Us

Follow Us